How to Create and Use a Project
Last updated: March 10, 2026
SuperNinja allows you to organize your work efficiently using Projects.
Here is how to create a Project:
Click the Project folder icon on the top-left panel of your dashboard.
Give your project a meaningful name (e.g., Marketing Research Q3 or Python Debugging).

Upload any files you want SuperNinja to use (docs, PDFs, datasets, etc.). These files stay connected to the project, so the AI can reference them anytime.
Enter your first prompt in the prompt box and SuperNinja will automatically create a thread.

You can rename the thread and Project at the top by double-clicking the title.

Start New Threads in the Same Project
In the left panel, open your project.
Write in the prompt box you prompt to start another conversation inside the project.
You can continue the existing chat or create new ones anytime

Manage Files Anytime
You can upload or add files to a project at any time.
Click on the project you need, then click Files at the top of your dashboard, and select Manage Files.
From there you can:
Delete files easily by clicking the cross next to an item.
Add new files and click Save.

Delete/Manage Threads
To delete threads inside a project, click the project icon in the left panel.
Click the three dots (⋮) next to a project or Thread for options like:
Open in new tab
Branch in New Tab
Pin
Move to project

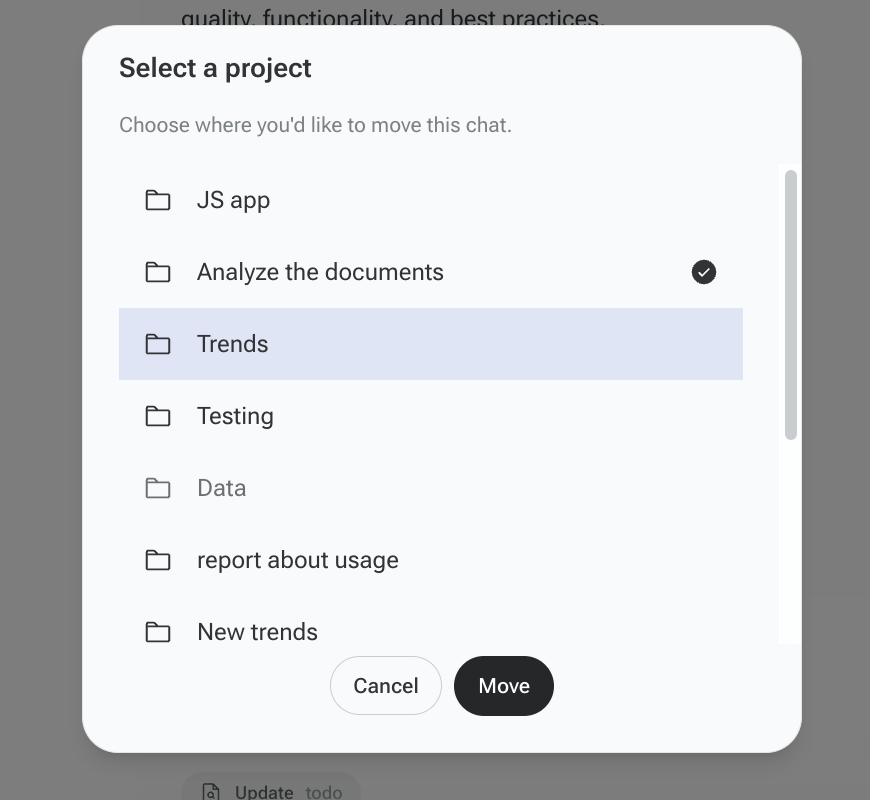
How to Move a Chat to a Project
You can organize your chats by moving them into specific projects. Follow these steps:
Open the chat conversation you want to move.
In the top-right corner, click the folder icon with a plus (+) sign.
From the dropdown, choose the project where you want to move the chat.
Click Save to move the chat into the selected project.
It helps you continue working on the chat within the project context and start a new thread in that project without losing the original conversation or content.

If you have any questions, please contact us at support@ninjatech.ai or submit a request through this form. We’re here to help!